What is also important in making a myboshi beanie is changing colours of the hat, which you do once you come to the end of your ’round’. You introduce the new colour at the ‘slip stitch’ stage, where you insert your hook into the stitch and loop the new yarn onto your hook and back through the stitch, and the pulling the yarn tight to close up the seam.
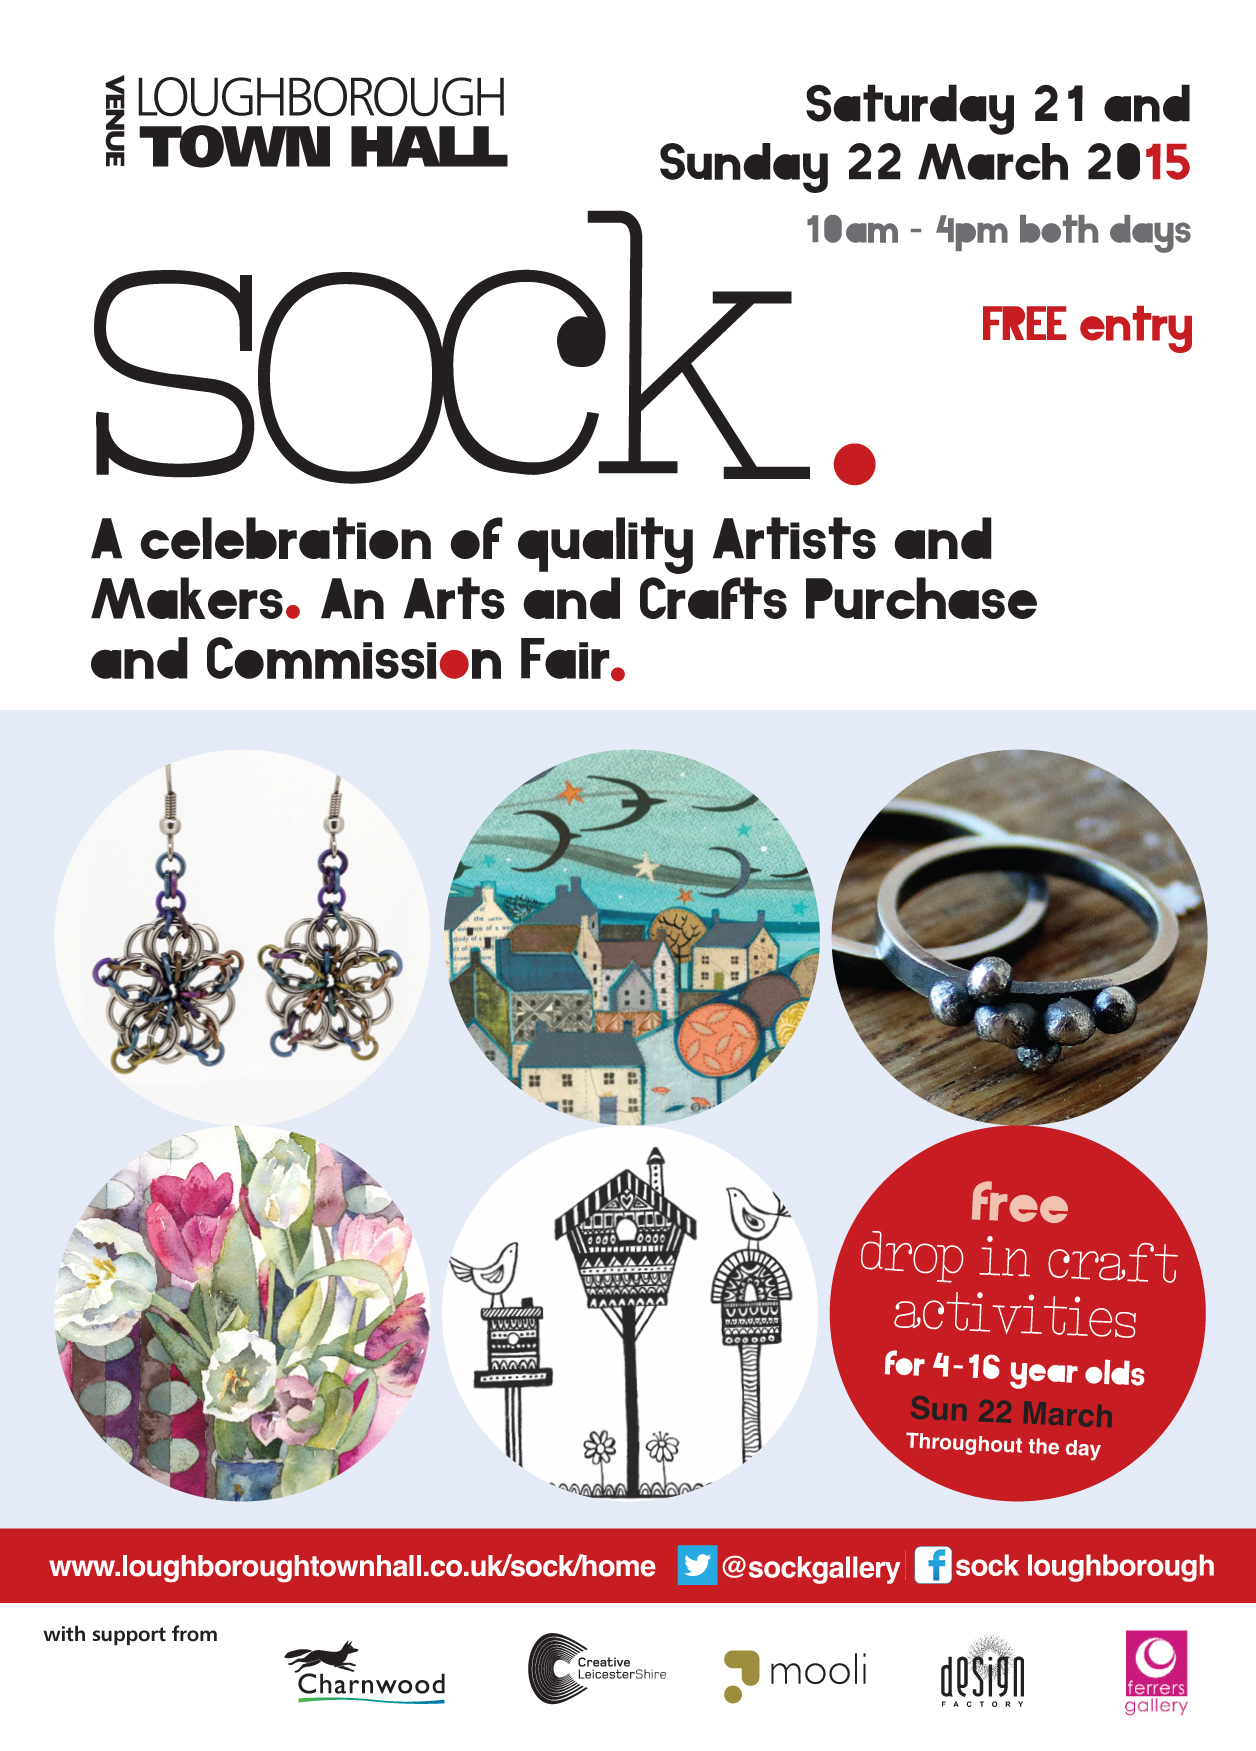
We are going to be running a crochet workshop at the Sock Fair at Loughborough Town Hall on Sunday 22nd March 2015.
Come along and bring your 4-16 year olds to participate in some creative crochet sessions! Make funky coloured bugs and creatures or fashionable headbands and bracelets. It’s free to join in, so we hope to see you all there! the workshop will fron from 10am – 4pm.
It’ll also be a great opportunity to take a look at all the fantastic arts and crafts on offer from our local artists!
When you have mastered crochet you will find that this versatile pastime is very satisfying.
There are so many things you will be able to create with different yarns and hook sizes from fine lacy shawls to baby layettes and chunky scarves and hats, or cotton tops for the spring.
The great thing about crochet is that it grows so quickly!
Yarns
Most yarns can be crocheted, some are very fine and lightweight, like the mercerised cottons and silk and wool blends. Any double knit and chunky/aran weights can be used for garments or household accessories.
The colour ranges of yarns are fantastic, really bright and lively to muted and classy looking colours you will always love.
Patterns
Crochet is enjoying a revival in interest, years ago there were lots of patterns around if you wanted to crochet a table set, but as these aren’t so popular now we need to find more up to date patterns to work on. There are plenty of books out there and online content with some great ideas.
patterns do vary in different countries. US stitches are different to UK ones.
Stitches
The basic stitches you need to know in crochet are:
Chain Stitch (Ch) This is the foundation of crochet work. Make a loop with the wool and hold it in one hand with the hook in the other hand. Pass the hook through the stitch and then loop the yarn round the hook then pull it back through the loop, this makes a chain. Keep doing this until the desired length is required.
Slip Stitch (ss) Insert the hook into the stitch to the left of the hook, loop the wool round the hook and draw back through the stitch and the loop on the hook.
Double Crochet (dc) Insert the hook into the stitch to the left of the hook, catch the wool with the hook and draw through the stitch (2 loops on the hook), put the wool over the hook again and draw it through the 2 loops on the hook leaving 1 loop remaining.
Half Treble Crochet (Htr) Loop the wool over the hook then insert the hook into the stitch, loop the wool again and pull through the stitch (3 loops on hook), loop the wool again and pull through all 3 loops leaving 1 loop remaining.
Treble Crochet (Htr) Loop the wool over the hook then insert the hook into the stitch, loop the wool again and pull through the stitch (3 loops on hook), loop the wool again and pull through 2 loops on the hook, loop the wool over again and through other 2 loops leaving 1 loop remaining.
Double Treble (dbl. Tr.) Loop the wool over the hook twice, insert the hook into the stitch to the left of the hook, loop over the hook and pull through (4 loops on hook), loop the wool again and pull through 2 of the loops on the hook, then loop the wool again and pull through the remaining 2 loops on the hook leaving 1 remaining.
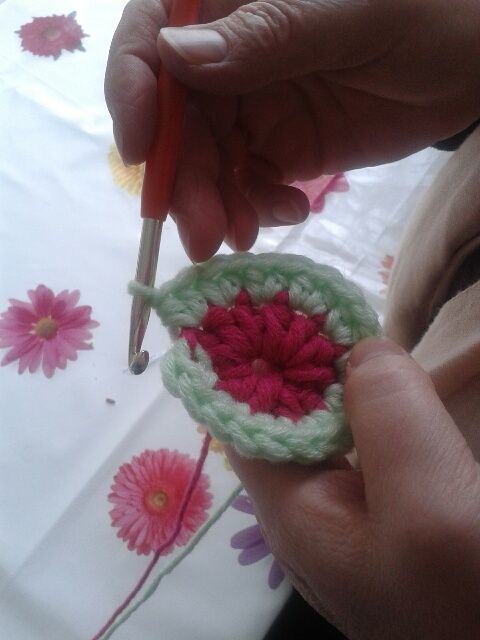
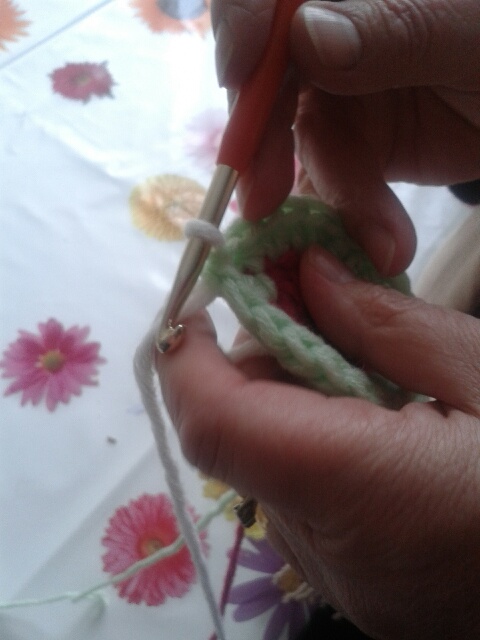
Closed circle When starting a round item like a beanie hat this is an ideal way to start. Loop the wool around in a circle, insert the hook through the back of the circle and pull a loop through, holding the loop tight Insert double crochets into the ring (as many as needed for the pattern) and the pull the circle tight. You now have the start of your work.
There are many other stitches but if you start with these you will be able to do most things, please look at the pattern though as I have found variations on the abbreviations and types of stitches, so if you have got to grips with these and you find that on your pattern it is slightly different you will be able to adapt to what they are asking for to make the pattern work.
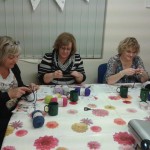
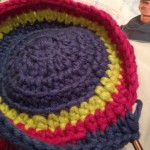
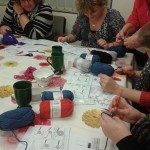
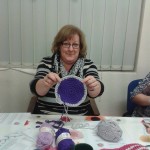
This week we have been making crochet myboshi beanies
Well we are getting to that stage of waking up again its nearly Spring! We’ve lots to create in the next few weeks to brighten ourselves and our homes after the long freezing winter.
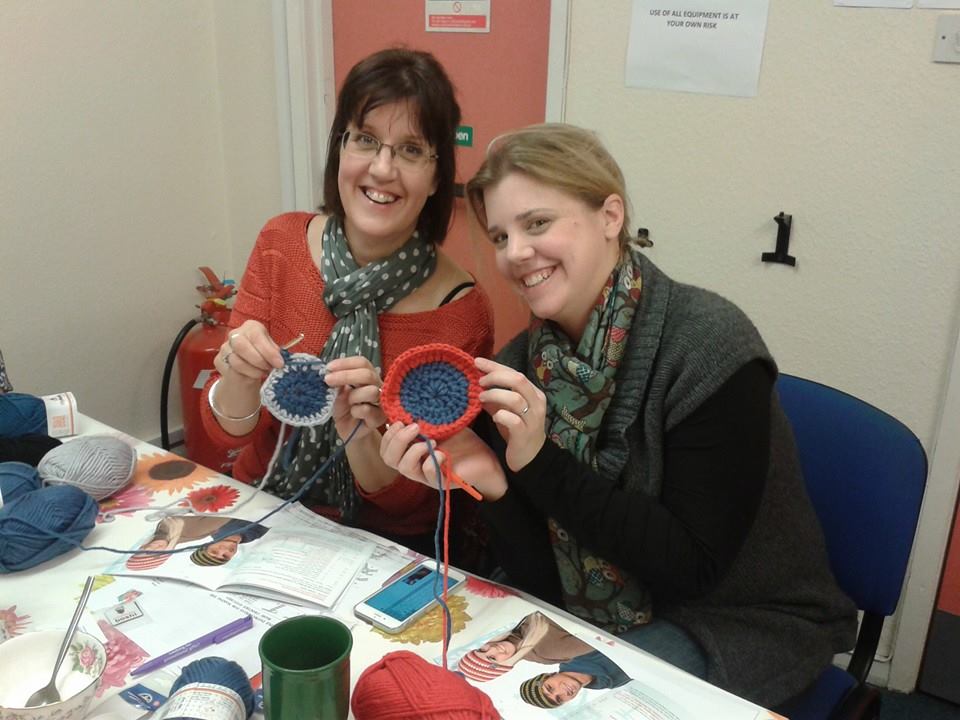
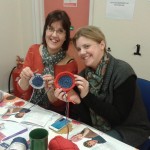
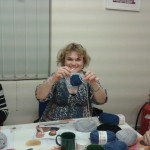
Everyone that came had either no idea or just limited knowledge of crocheting, so we started with a step by step guide, with the aid of our trusty camera projecting onto a screen showing the process as I demonstrated. This approach seemed to work really well, and taking our time they learned a few basic stitches to get them started with crocheting. A bit of practice later and it was time to start the real thing. Tea and cake came out then, we needed it!
In the MyBoshi books there is a great guide to help you with the stitches, but most of the ladies were fearful as they had no understanding of a crochet pattern, so we showed them how to read the abbreviations as we began to make the beanies, it all becomes clear when you have a hands on approach and follow it logically.
Some picked it up more quickly than others, we used the stitches learnt, and with patience guided them through the process. Everyone seemed to enjoy it and they all made a good start on their beanies. We were delighted to get a picture of a finished beanie a couple of days later, well done to all the ladies we hope they enjoyed it, we did. So come back soon! Next workshop on 2nd March! Click here for booking.
So what’s happening over the next few weeks..
March is pretty busy with Easter craft workshops, both at Bridge Street and at Lubcloud Farm, these will be great fun so book soon. There is also stuff for the kids at a drop in workshop we are doing for Loughborough Sock Gallery, ‘Lets make bugs’ for the younger ones and ‘funky crochet’ for the teens. There is also the Cozy Crochet club, alternate Mondays, and Sewing BEE on alternate Thursdays. Dressmaking is the thing for Spring.
We also help people with their own special projects, like making curtains, or dressmaking.
So there is lots to do and we would love to hear from you if you need any help or would like to join in any of our groups and workshops.[/fusion_builder_column][/fusion_builder_row][/fusion_builder_container]
My resolution is to do more of the things I like doing and feel relaxed about and less of the irritating and time consuming things that are too stressful. So sewing, knitting, crochet it is.
Christmas at our house is hectic, all the family turn up and we end up being a bit frazzled, but happy to see everyone. Just prior to this I saw my little 8 year old niece, I taught her to crochet a couple of months previously, she was happy making friendship bracelets and hair braids. A lady told her that her mum taught her to crochet but she didn’t carry on with it, so my niece was very proud to tell me that she had managed to teach the lady to crochet as well… well done Tabby! We will make beanie hats for Barbie next!
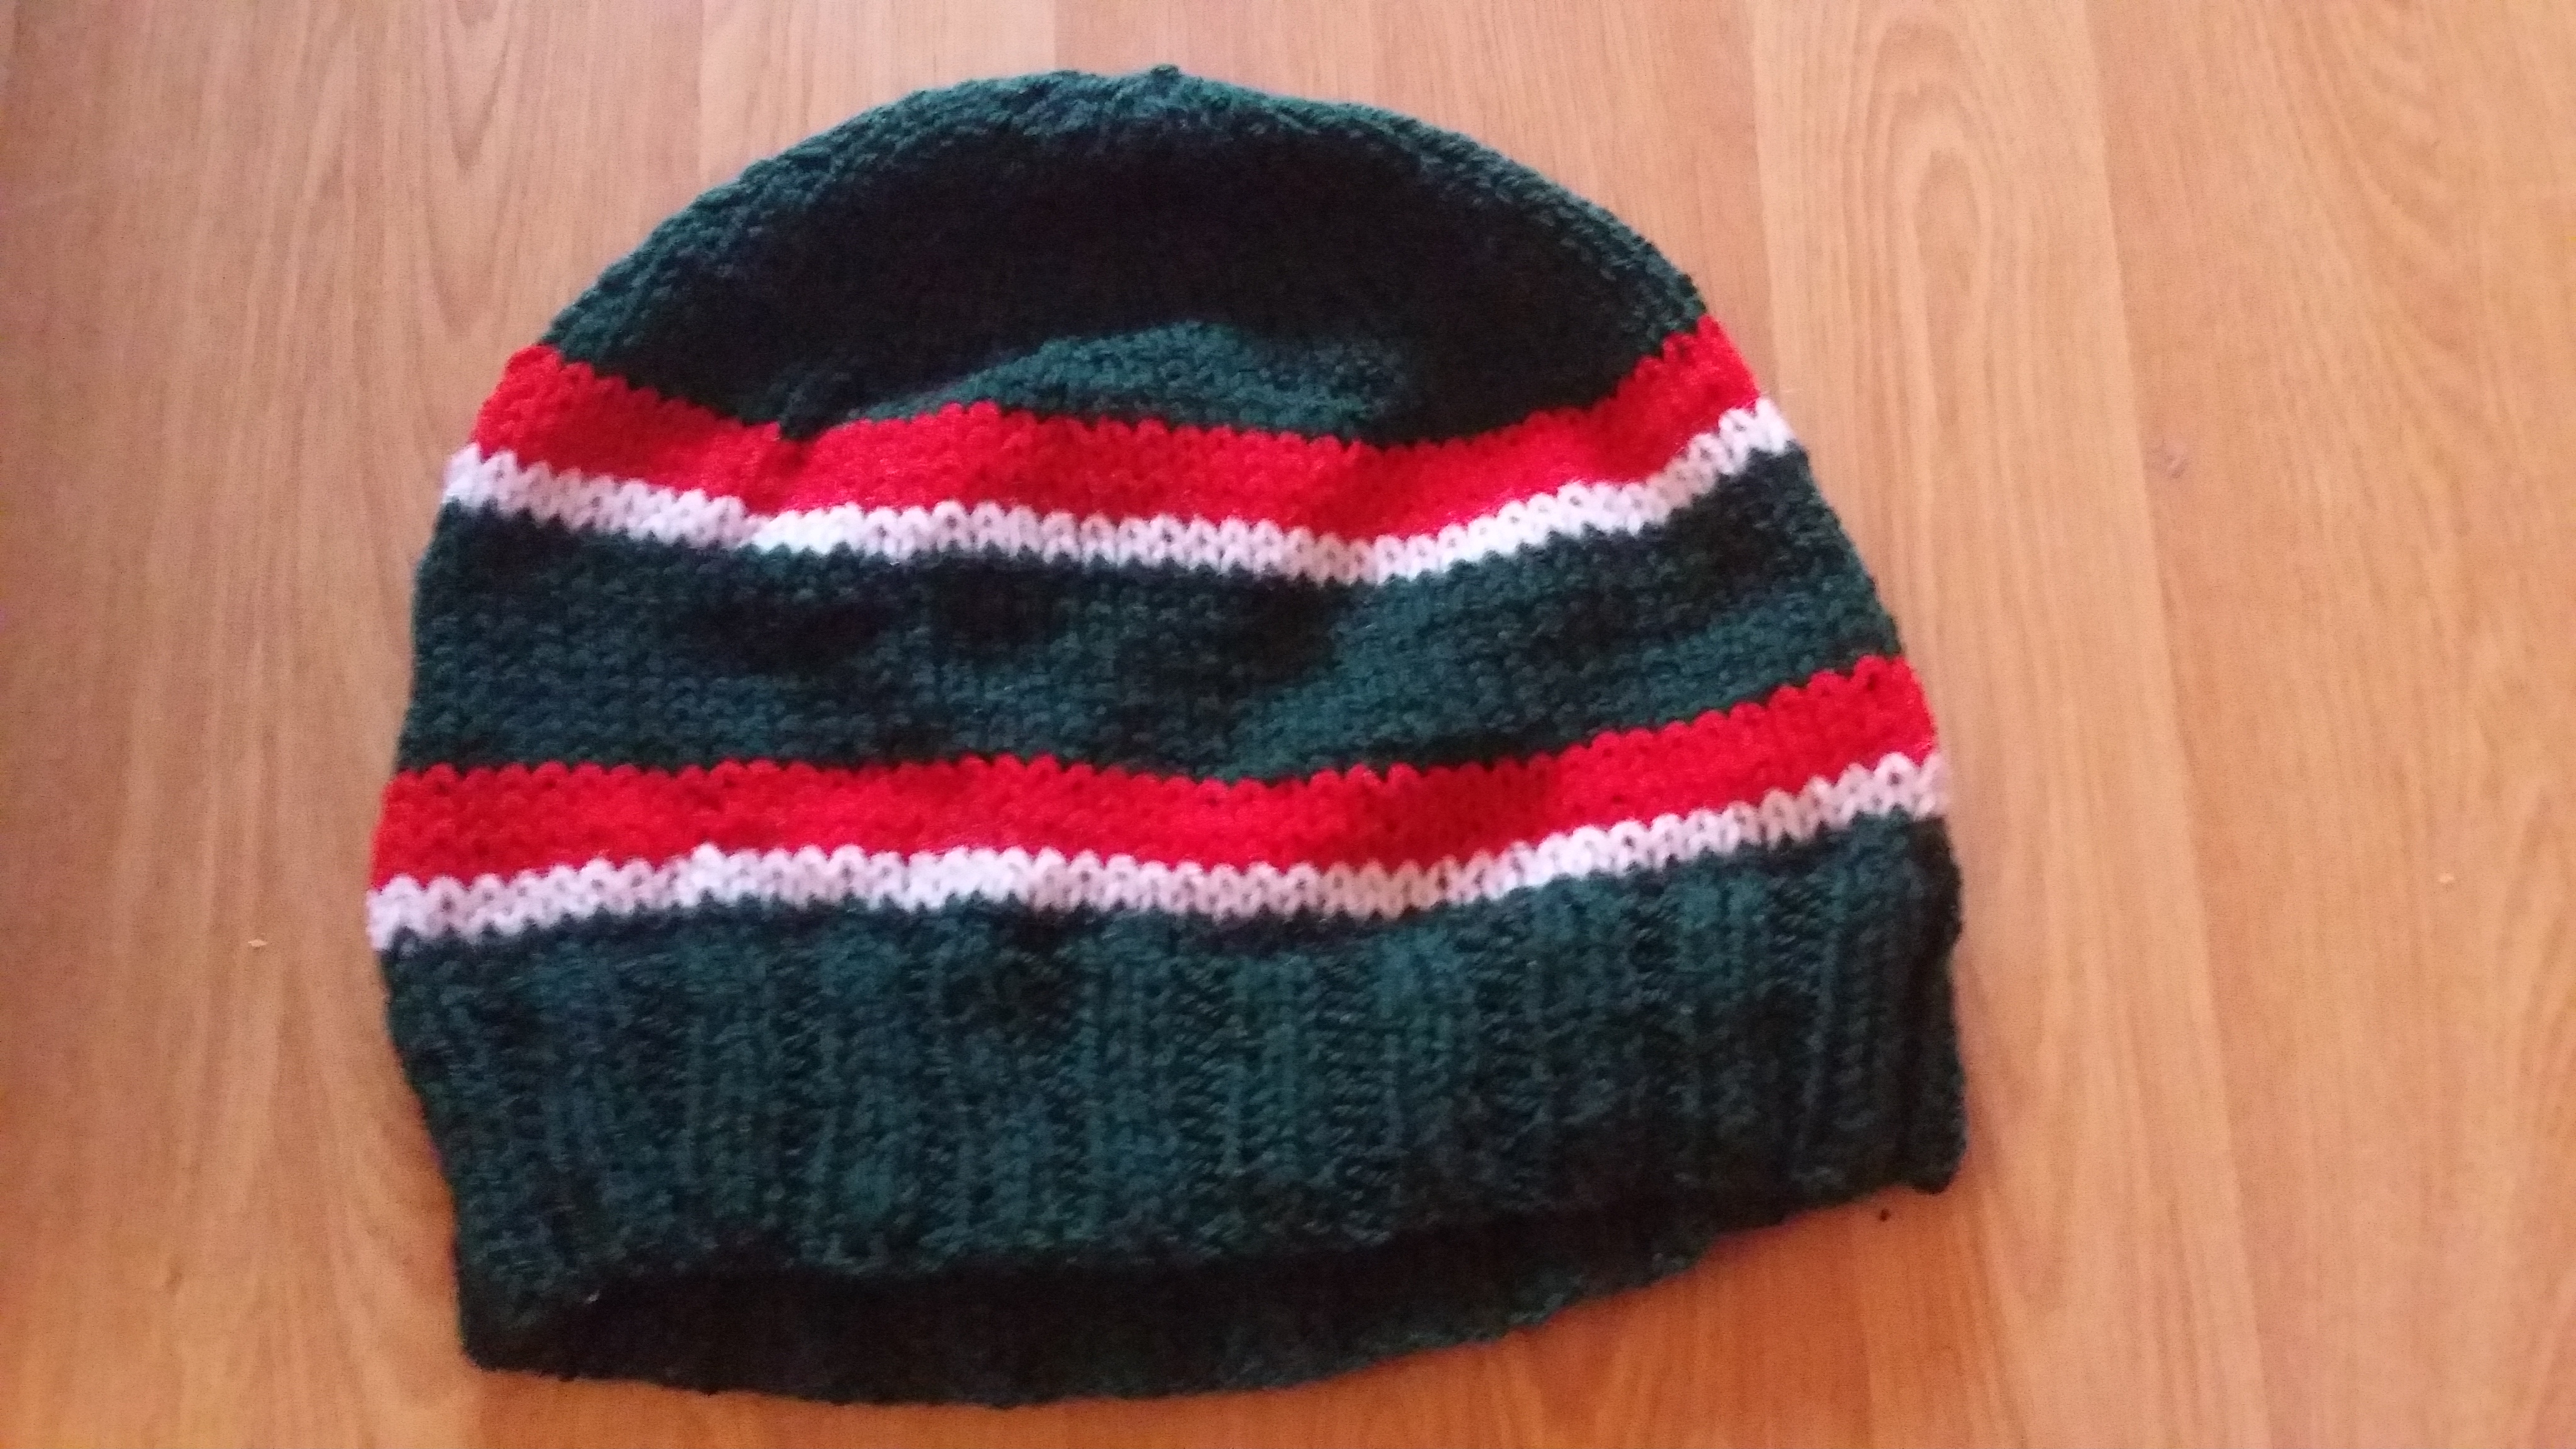
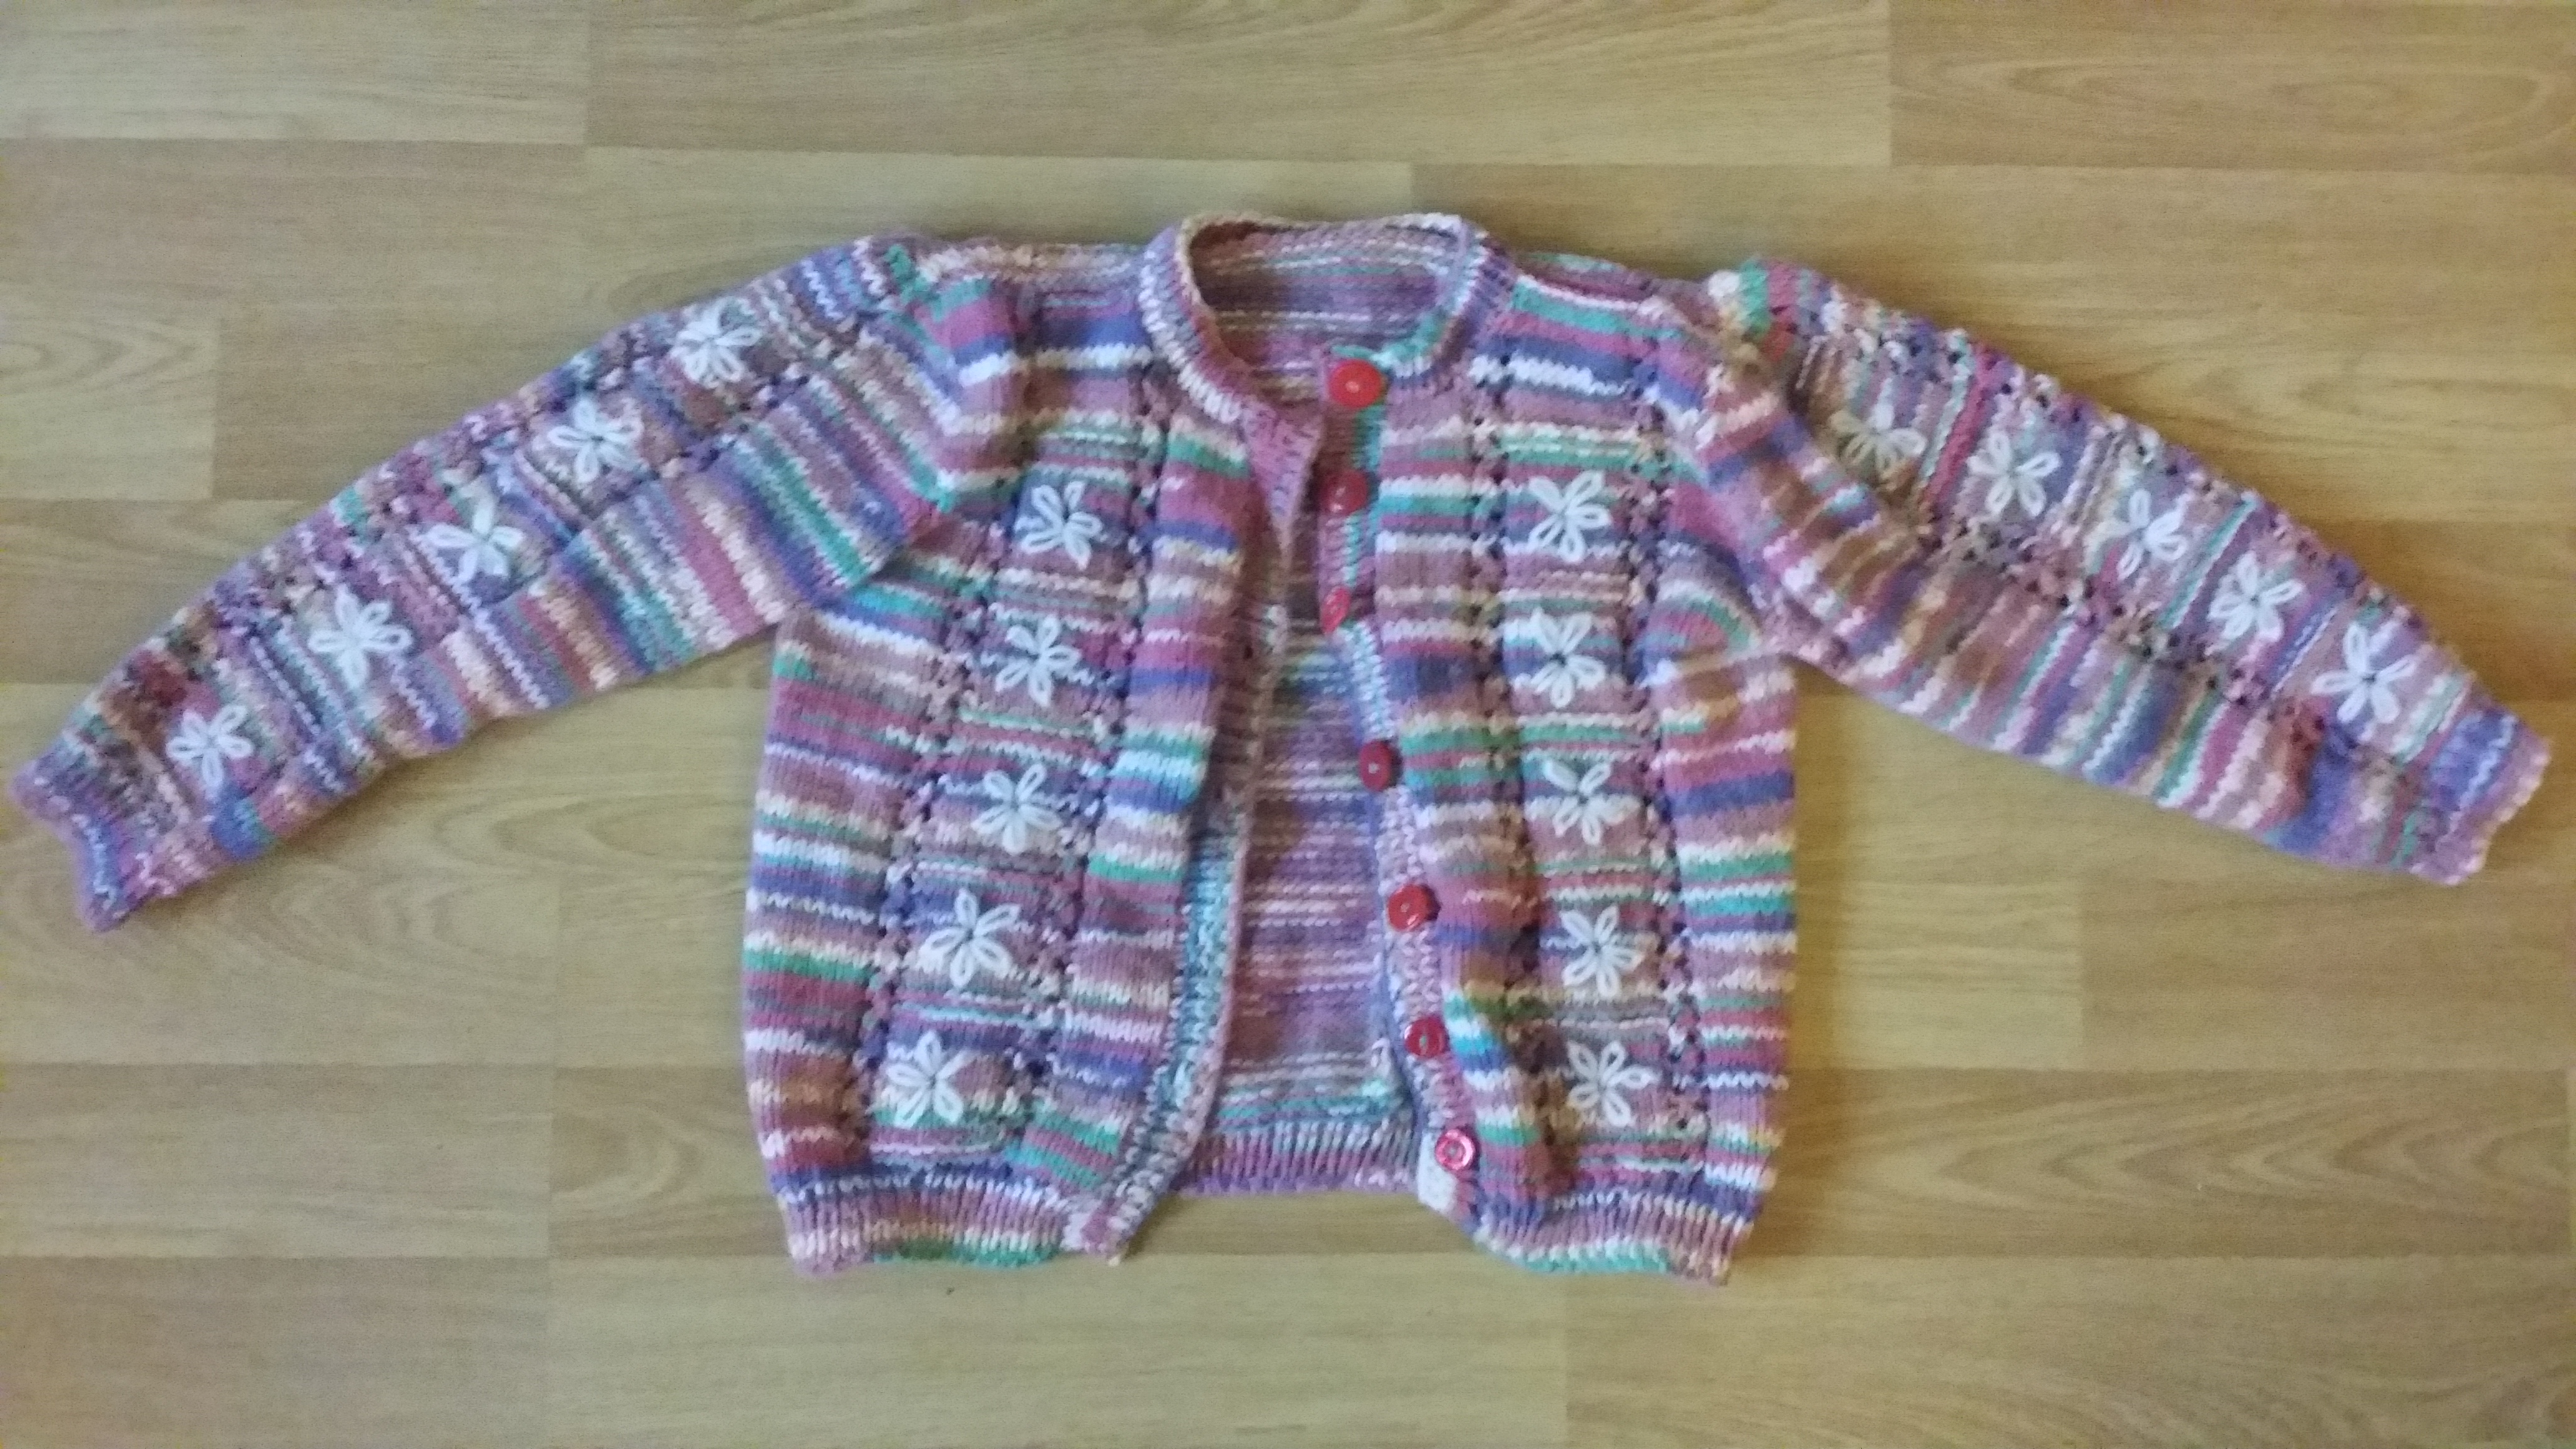
Over the Christmas break I have had time to finish off a load of stuff that has been building up which is amazing for me, so I have knitted two ‘Tigers’ (rugby) beanies, finished off a cosy little cardigan for our two year old , made a ‘Frozen’ dress and started a ‘Peppa’ jumper for the 18 month old. All I have to do now is finish off designing a new range of children’s play things….its all in my head so I have to write it down quickly…. And another couple of crocheted beanies that have been requested along the way, oh… and recover a vintage child’s cot. Then I can turn my attention back to planning and preparing more creative stuff for the new year!
For the beanies, I downloaded some patterns before Xmas, and have used the best of two designs to create my ideal one. The first one is a bit bigger and my daughter prefers this style as it drops down a bit at the back, the second is a more classic fit. I used three colours DK dark green, white and red to create the stripy effect. I have two more that I will crochet for the surfers in the family I have found a wicked pattern with waves they will love it.
The cardi, was knitted using Sirdar Crofter baby Fair Isle effect DK, a lovely yarn it gives a pretty effect, the knitting pattern is from Sirdar’s The Essential Baby Book, design C. I like this book, the patterns seem to work well so I have done most of them at some time or another. The cardi is finished off with a lazy daisy stitch and lots of red buttons (all different) … very cute.
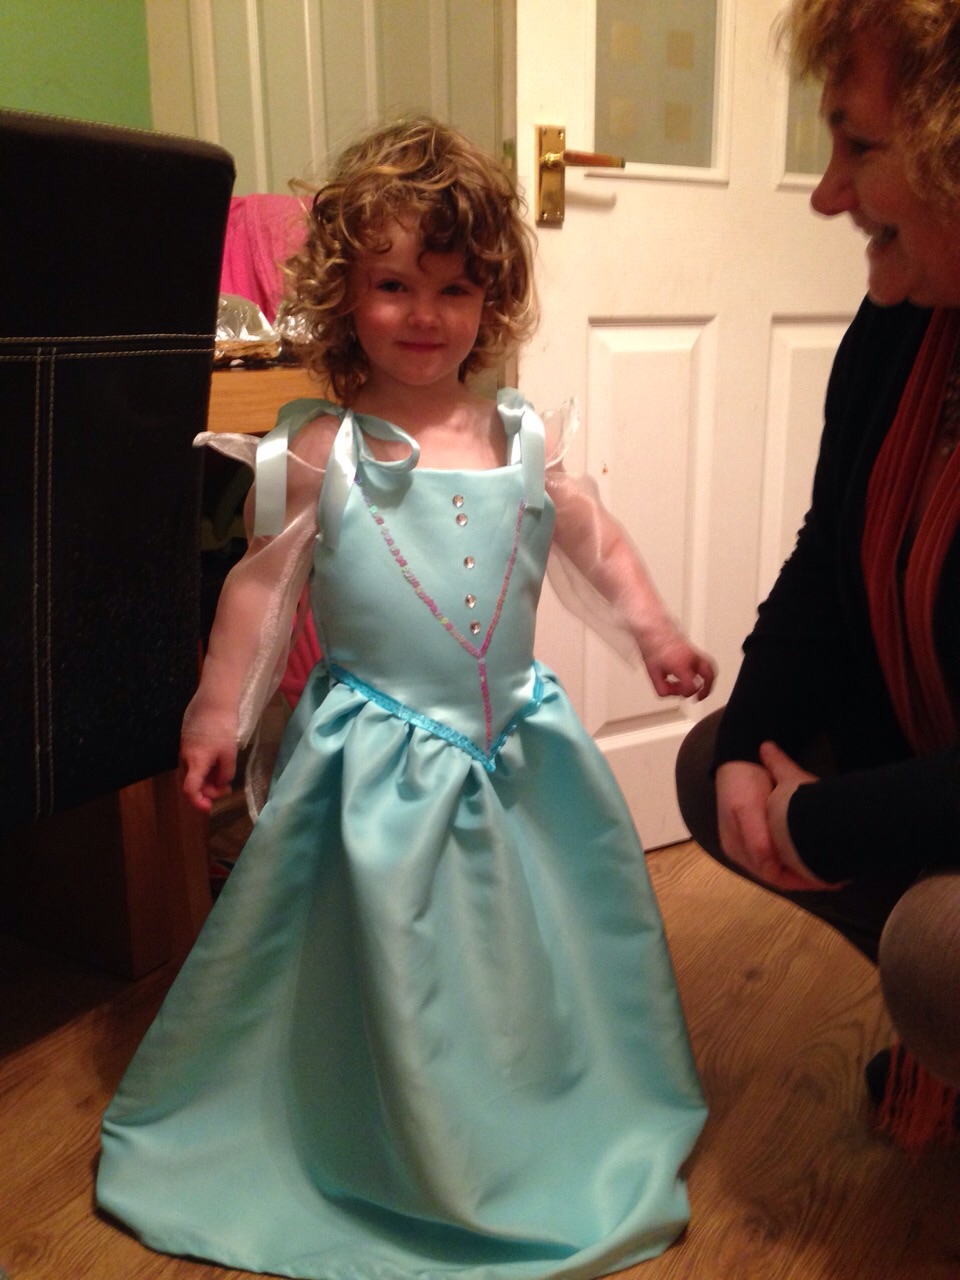
Now the ‘Frozen’ dress, this is the fourth I have made, all have been differing styles, but this one I wanted it to ‘grow’ with the child, so it has drop sleeves, and ribbons on the shoulders which as she grows can be retied to fit, and I have left the length to the ankle as well for more growing room. It looks very princessy …. Lovely.
Frozen Princess Dress
Working on the cot next, I had to buy a new staple gun before Xmas, I have mislaid my old one.. where I do not know probably left it somewhere… anyway, I have this lovely pink satin to replace what was originally pink silk with a 60’s black and white plastic, sounds weird, but so 60’s and stylish. I have carefully taken off the silk but I am going to retain the plastic because it is vintage and recover the base and the buttoned headboard in the satin. The bottom has proper webbing and is tacked on, so I will just make sure this is ok and then it will be perfect for a little dolly to sleep in eventually.
OK so now working on the children’s range of toys.. I cut out templates last night and started sewing them together, but I am not really happy with the fabric I am supposed to be using, it will be ok for a sample but not sturdy enough for the ‘real’ thing, so I need to look for alternatives. More to come on this so I will let you know about progress.
So a great start to the New Year, I wonder what the rest of the year will hold, I am bursting with ideas, so try and keep up!
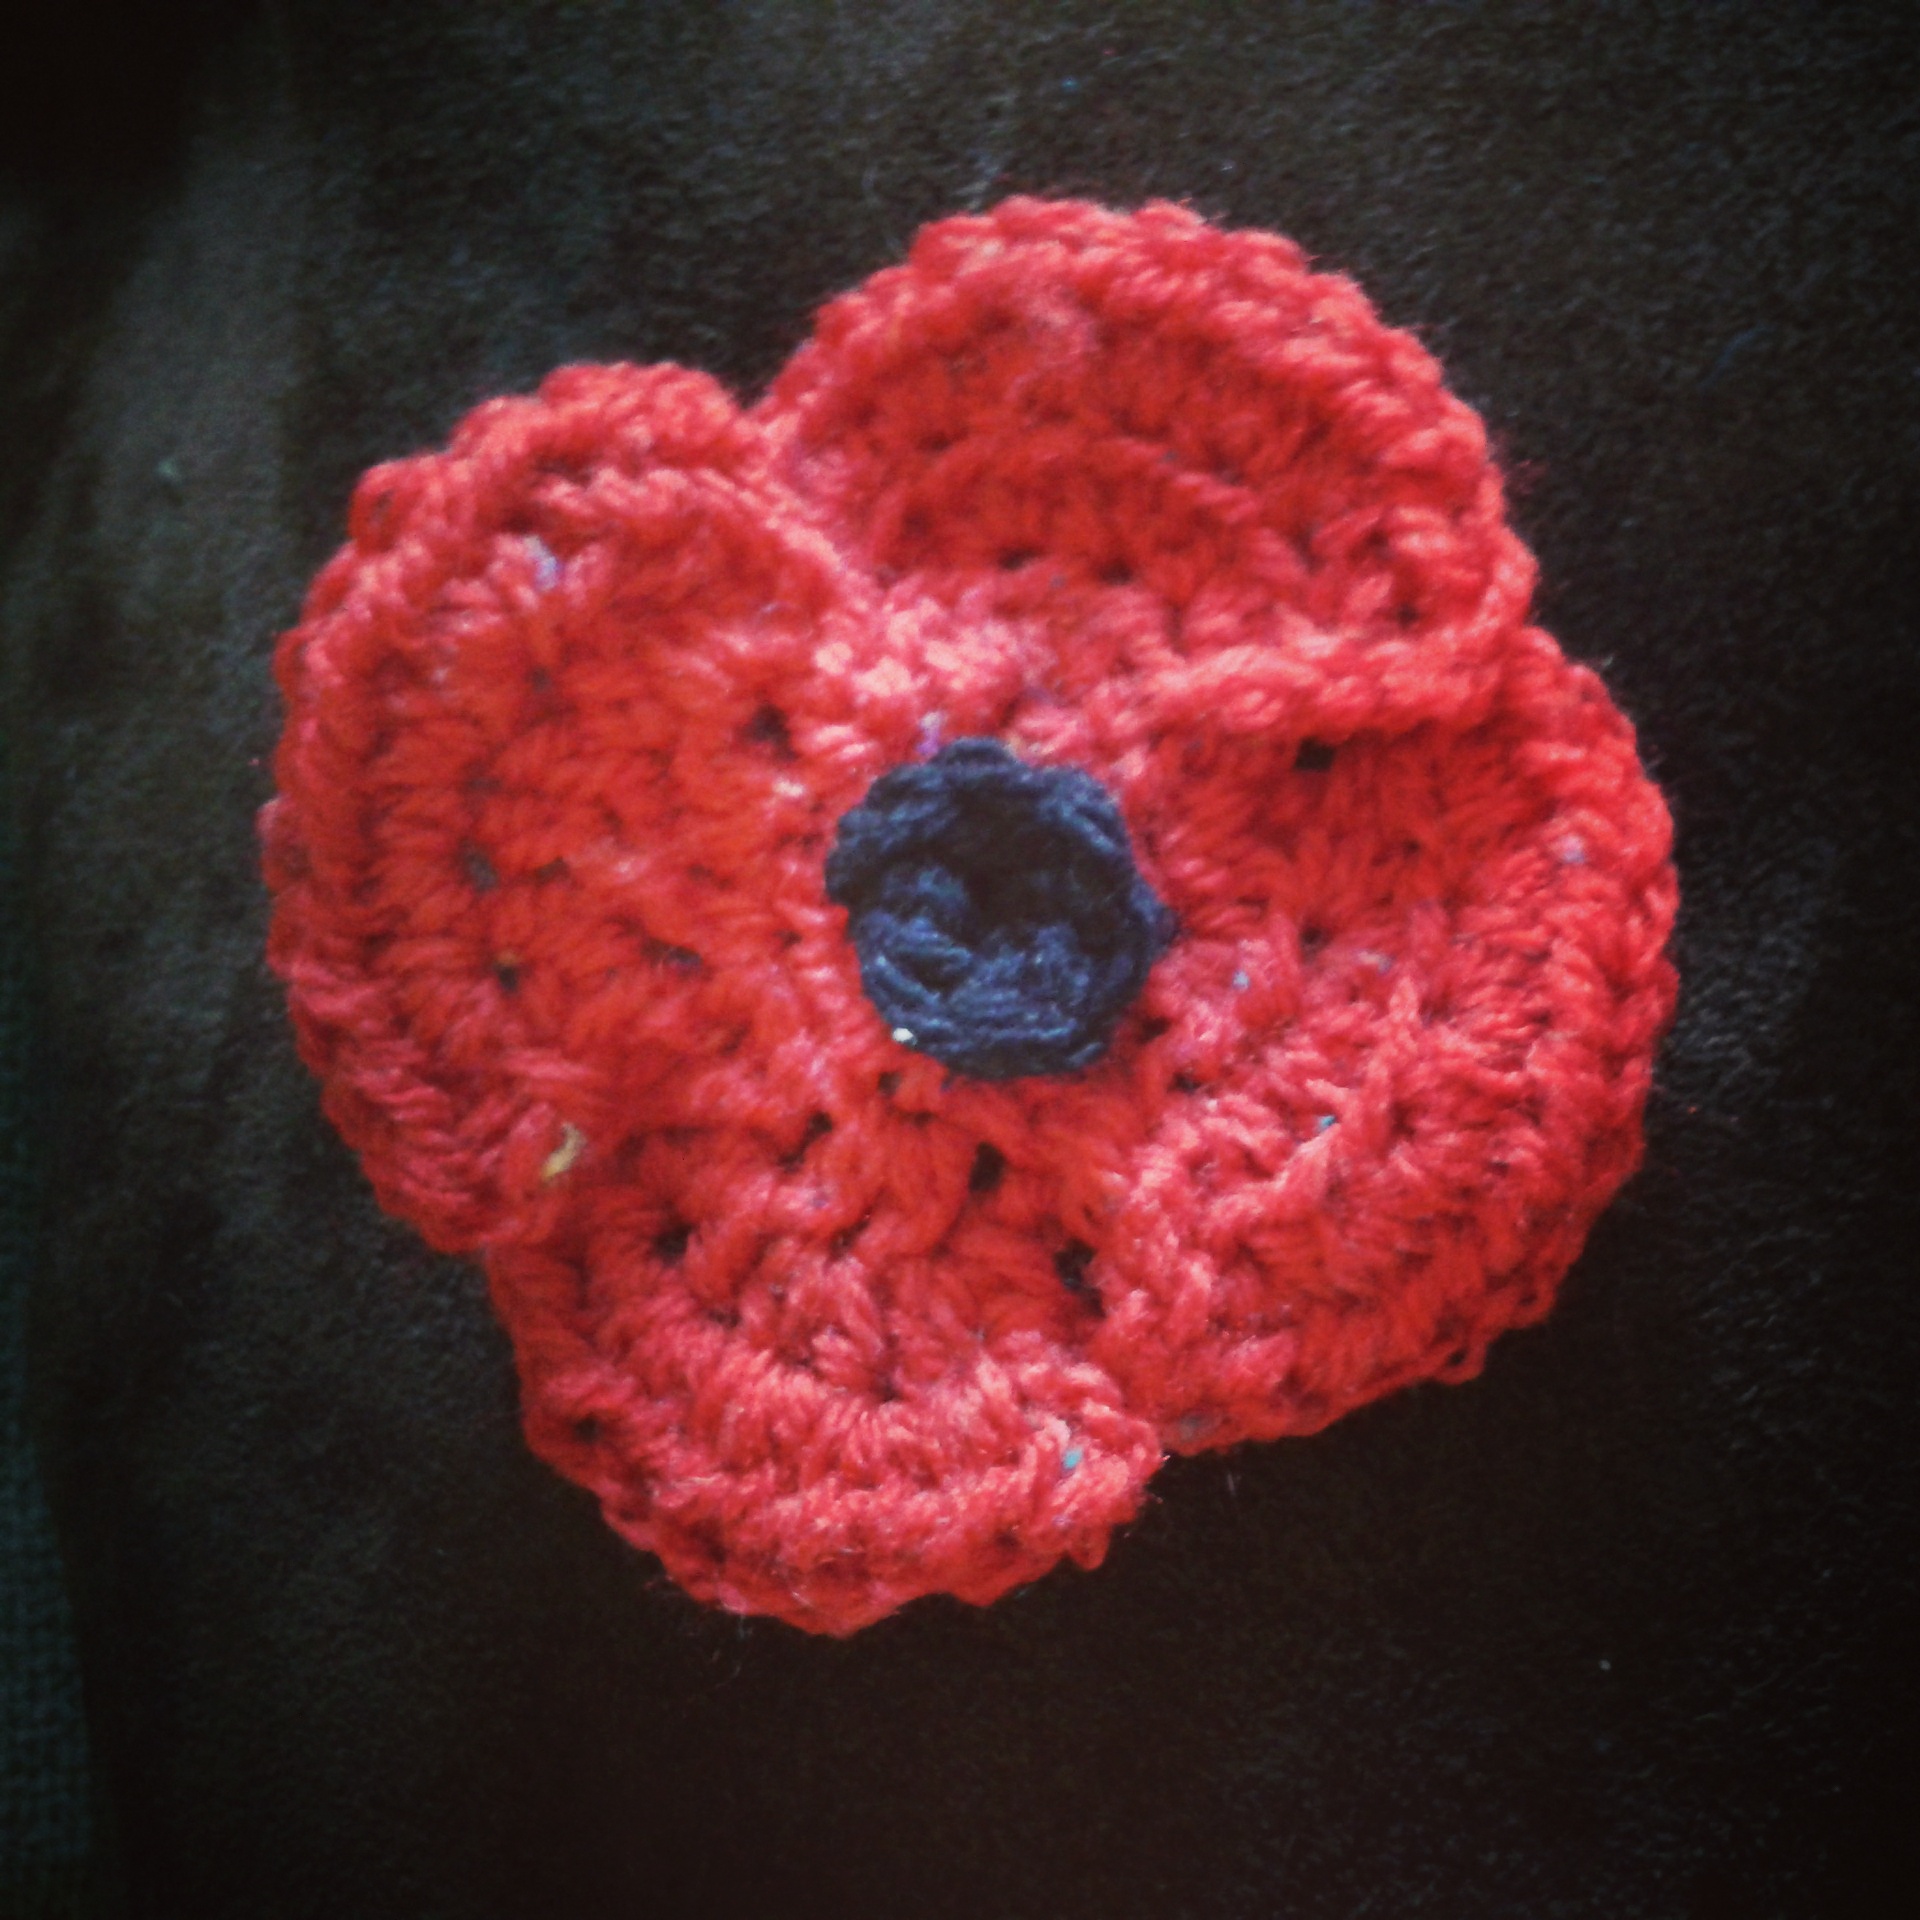
OK so we were asked to do a few poppies, most of the ones I have seen are basically round with a hint of petal, I have done two versions one with four petals and one simpler round one both are a good size. I crocheted them in DK bright red acrylic, with a black centre in a chunky acrylic with a 4.5mm hook. So here we go…
RED POPPY WITH PETALS
R1 C3 loosely, slip stitch to form ring
R2 C2, HT 10 times into the ring
R3 C2, 1HT into same stitch, 2HT into next stitch, 1HT into next stitch. This is the base for the first petal, turn and work on this petal only.
R4 C2, HT twice into each stitch to end
R5 C2, HT twice into each stitch to end. C1 the slip stitch 3 times down the left hand side of the petal then 1 slip stitch into the next stitch on the ring.
Repeat R2 – R6 3 times more to form 4 petals around the ring.
R6 1 slip stitch into first stitch on the ring then 3 slip stitches up the right hand side of the first petal, finish off.
BLACK SPOT
C3, slip stitch to form ring, then slip stitch twice into each stitch on the outer edge of the stitches to form the
black spot, finish off and sew on the poppy.
ROUND RED POPPY
R1 Make loop, C3, slip stitch to form ring
R2 C2, HT 9 times into ring, slip stitch into 2nd chain to join the row
R3 C2, HT into same stitch, then HT twice into each stitch around the row, slip stitch into 2nd chain to
complete the row
R4 repeat R3
R5 C2, HT into same stitch, then [fusion_builder_container hundred_percent=”yes” overflow=”visible”][fusion_builder_row][fusion_builder_column type=”1_1″ background_position=”left top” background_color=”” border_size=”” border_color=”” border_style=”solid” spacing=”yes” background_image=”” background_repeat=”no-repeat” padding=”” margin_top=”0px” margin_bottom=”0px” class=”” id=”” animation_type=”” animation_speed=”0.3″ animation_direction=”left” hide_on_mobile=”no” center_content=”no” min_height=”none”][HT twice into each stitch 10 times, slip stitch into next stitch] 4 times finish
of with a slip stitch to 2nd chain of first stitch
Abbreviations::
R= Row
C= Chain – hook through loop and pull yarn through, this makes one chain
HT= Half Treble – yarn round hook insert hook under stitch, pull through loop (3 loops on hook) then pull yarn through all
three hoops.
If you would like to download the full pattern and print it please do so here poppies pdf.
Please donate to The Poppy Appeal if you are going to wear this for Remembrance Day.[/fusion_builder_column][/fusion_builder_row][/fusion_builder_container]
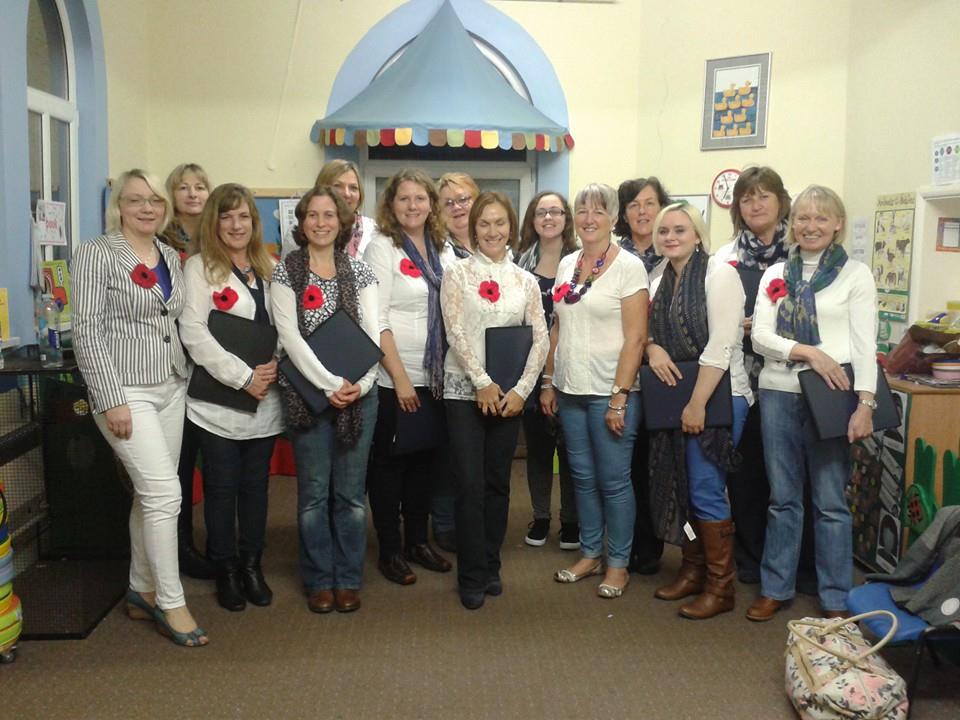
We are very proud to have made some crochet poppies for the Music In Me choir from Woodhouse Eaves, Leicestershire. The ladies were performing for Kegworth Methodist Church where they performed an array of hits from musicals, present day and past classics.
Donations for the poppies will be taken for the Poppy Appeal. Look out for our tutorial on how to crochet one of these poppies!